I took the plunge and got myself a DSLR camera just before our second son was born. After seeing the really crummy photos of our first birth, I wanted something better!
A DSLR camera (I have this one, but there are newer versions) will dramatically improve your photos of kids simply because it can give you more clarity and capture motion and light so much better, even on an automatic setting.
It wasn’t until about four months ago that I finally got off the automatic setting and began learning how to shoot manually. I know, I know, over two years!?
I’m on a learning curve, and I will never be hanging out my shingle as a photographer, but I’ve picked up a few basic tips that might help my fellow newbies! Forgive my lack of technical terminology! And, please know, I don’t consider my photos to be fantastic, but I have come a LONG way since I started taking photos of my children, so I thought other moms at my level could benefit from what I am learning!
Tips for better photos of kids (yours, that is!)
Improving your camera use
If you can swing an extra $100 or so, get a 50 mm lens. You’ll get stunning close up shots with better light aspects. Since I bought this lens, I rarely go back to the kit lens (sometimes I do for outdoors or in crowded places). You have to stand much farther back, as there is no “zoom” feature on this lens so you move your body closer or farther from the subject.
Turn off your flash.
Play with those settings! The best one to start learning is ISO – that controls how much light is getting in.
- 100 is for outdoors where the light is already bright.
- 6400 is for your worst possible light situation (but I generally find this one is either too bright or not bright enough.
- 800 and 1600 work best for me indoors as long as I am near a window).
You have to play around with your camera because every lighting situation is different. Just snap a photo, check it and adjust up or down as needed.
For your photo location
Use natural light whenever possible. Go outdoors, find large windows.
Turn off indoor lighting (see why you need natural light!?)
Shoot early morning or late afternoon. (8-10, 3:30-5:30 works best for me, but it changes with the seasons too).
Try to shoot on an overcast day. Bright sunlight creates glare and shadows and may be too much light exposure for your lens. If not overcast, try a shaded place so you get even lighting.
Shoot with the light to your back, so it’s falling on your child’s face.
Shoot from above! Have the kids lay on the floor and get on a chair (or just hover over) and take some shots of them looking up at your or at each other. Or playing with a toy, etc.
For wardrobe and props
Dress your kids simply – bold colors are best. Experienced photographers can do wonders with neutrals and whites, but this is a beginner’s guide, remember!
Use a funky textured blanket – this is especially great for shooting from above.
Avoid a lot of patterns, but a cute print or two is okay. (Personal opinion, kids can pull off patterns and prints but depending on your background and lighting, for beginner’s keeping it simple is often better. Feel free to experiment though!).
Don’t be afraid of bold contrasts. A child by a bright window can make for a great black and white image! Now this photo is a little too out of focus, but I like that I captured him when he didn’t realize I was still snapping photos!
Go barefoot. The kids, not you! Nothing is more distracting than a glaring white sock or dirty sneaker! Simplify the photo by just taking the shoes off. Unless…of course, you’re photographing shoes.
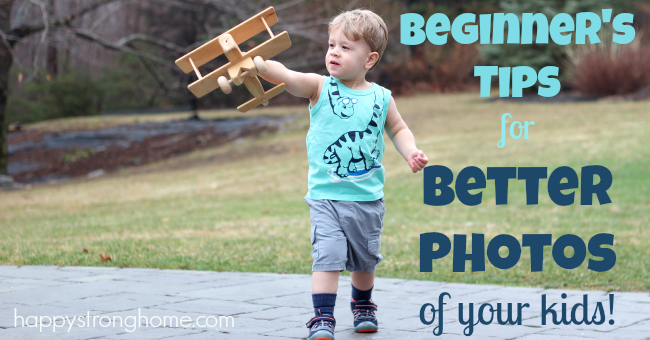
Give your child an interesting toy for a prop. This keeps them engaged, and also adds interest to your photo. Oversized wooden toys like this airplane are great!
Use textures in your backgrounds. Stand your child against a brick wall, in front of a window-paned door, or by a pillar. I know my son’s expression in this isn’t “professional photographer” but he actually makes this expression a lot to be silly, so to this mama, it’s a special photo. Notice how the brick wall behind him is a little out of focus? That’s a good thing actually – it makes your child/subject stand out!
Be patient…and snap a lot of photos. Most will not be great, but in the mix you’ll snap some gems!
Thanks to Jenni from Jennifer Mirock Photography, I have some great photos of the kids, and I’m getting better at snapping my own!
The cute outfits in the photos are from The Children’s Place. I love the red pants on my five year old – they convert to capris with a button on the outside, so perfect for spring. There’s plenty of bold and exciting graphic tees for little boys right now too – like my oldest son’s big rig tee – goes perfectly with the red pants! My little guy loves his “long-neck” dinosaur on his tank top. The aqua blue-green was a vivid color for our photo session, with gray shorts for a great neutral.
This post is sponsored by The Children’s Place and I was sent outfits for review. All opinions are my own. Affiliate links have been used in this post.


